Although we are just over two weeks into January, we haven't really started back into our routines. My kids haven't had much school work, and the bad weather means that Caleb's therapy has been cancelled several times. David just started college yesterday, so we had a two week break after Christmas.
That means that we've had two glorious weeks where we didn't have much to do. We played board games, watched an entire season of The Big Bang Theory, and I got through my almost full DVR.
I also had time to tackle my "want to do" list. These are things that don't need to be done; I just want to do them or try them. One of the things that I wanted to do was make homemade butter and buttermilk.
As I've talked about before, we are homesteading on a 12 acre farm. We have livestock, an orchard, and grow a big garden. We can and preserve our own food. I want to be self-sufficient or at least know how to be self-sufficient.
So I wanted to learn how to make butter. I've made it before with the kids using a mason jar. This takes forever to do and makes such a small amount. I have a 6-quart Kitchenaid , so I decided to use that.
Links in this post may be affiliate links, which means that I earn a small commission from sales.
As with most recipes, the better the quality of your ingredients, the better the quality of your final product. I used whipping cream for a local farm that's been organic since the 1970s, well before organic was a thing. As far as anyone in the county is concerned, they have the best milk.

That means that we've had two glorious weeks where we didn't have much to do. We played board games, watched an entire season of The Big Bang Theory, and I got through my almost full DVR.
I also had time to tackle my "want to do" list. These are things that don't need to be done; I just want to do them or try them. One of the things that I wanted to do was make homemade butter and buttermilk.

As I've talked about before, we are homesteading on a 12 acre farm. We have livestock, an orchard, and grow a big garden. We can and preserve our own food. I want to be self-sufficient or at least know how to be self-sufficient.
So I wanted to learn how to make butter. I've made it before with the kids using a mason jar. This takes forever to do and makes such a small amount. I have a 6-quart Kitchenaid
, so I decided to use that.HOW TO MAKE BUTTER AND BUTTERMILK
Links in this post may be affiliate links, which means that I earn a small commission from sales.
As with most recipes, the better the quality of your ingredients, the better the quality of your final product. I used whipping cream for a local farm that's been organic since the 1970s, well before organic was a thing. As far as anyone in the county is concerned, they have the best milk.

INGREDIENTS
- 4 cups heavy whipping cream
- 2 quarts ice water
- 1/8-1/4 teaspoon salt (optional)
DIRECTIONS
STEP #1
Let the cream sit on the counter for half an hour before you start to make butter. This helps the separation process happen quicker.
STEP #2
Pour the cream into a Kitchenaid mixer and use the whisk attachment. If you have a splash guard , use it and have a towel handy.
, use it and have a towel handy. 
STEP #3
Start at speed 1 and gradually move to speed 10. It will splash, so drape a towel over the mixer to stop it from maxing a mess.

STEP #4
Let it whisk on speed 10 until the buttermilk starts to separate. This can take anywhere from 3 to 10 minutes. It took 10 minutes for me. It should look like the photo below.

STEP #5
Drain the buttermilk and set aside. I poured mine right through a funnel and into a mason jar. You can use cheesecloth , but I did not. I was going to use it in pancakes, and my recipe calls for melted butter. What little bit of butter got into the jar wasn't going to make a difference for me.
, but I did not. I was going to use it in pancakes, and my recipe calls for melted butter. What little bit of butter got into the jar wasn't going to make a difference for me. 
STEP #6
Add two cups of cold water to the mixer and mix on medium speed for a minute. Drain off the liquid and discard.

STEP #7
Rinse and discard the water three to five more times until the water runs clear.

The first time I made butter, I rinsed five times. Since then, I've started using my hands to squeeze excess water out and only rinsed two or three times.
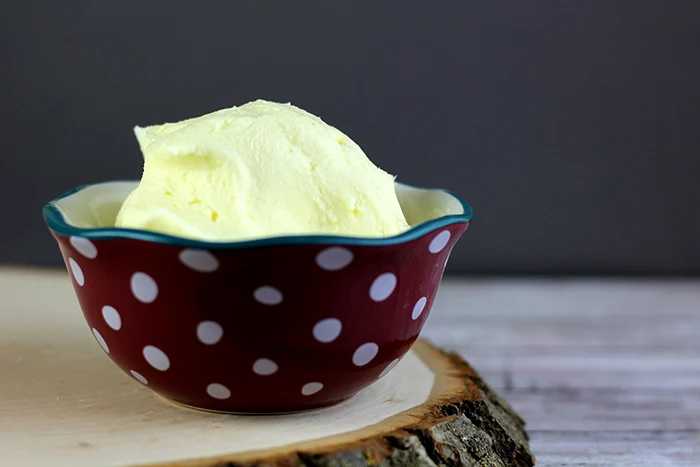
You should now have about two cups of buttermilk and two cups, or four sticks, of butter. You can press it in a butter mold, but I just put it in a plastic container.


No matter how hard as you squeeze, you won't get all of the water out of the butter. This water can make the butter go bad, so don't store it on the counter. Store the butter in the fridge up to two week or freeze it. For best results, use an airtight container to store the butter so it doesn't take on the flavors of your fridge or freezer.
You can also add herbs and spices or even honey or sugar to make flavored butter. Again, store it in the fridge.
You can also add herbs and spices or even honey or sugar to make flavored butter. Again, store it in the fridge.
The buttermilk can be used to make pancakes, biscuits, or even fried chicken. I used it to make buttermilk pancakes with homemade butter and real maple syrup.
If you won't be using the buttermilk within a few days, you can freeze it. I like to freeze it in an ice cube tray then transfer the cubes to an air tight container. If it separates when you thaw it, just mix it together before using it.
Homemade Butter and Buttermilk
Easily make butter and buttermilk in your stand mixer.
Ingredients
- 4 cups heavy whipping cream
- 2 quarts ice water
- 1/8 - 1/4 teaspoon salt
Instructions
1. Let the cream sit on the counter for half an hour before you start to make butter. This helps the separation process happen quicker.2. Pour the cream into a Kitchenaid mixer and use the whisk attachment. If you have a splash guard, use it and have a towel handy. 3. Start at speed 1 and gradually move to speed 10. It will splash, so drape a towel over the mixer to stop it from maxing a mess.4. Let it whisk on speed 10 until the buttermilk starts to separate. This can take anywhere from 3 to 10 minutes. It took 10 minutes for me. It should look like the photo below.5. Drain the buttermilk and set aside. 6, Add two cups of cold water to the mixer and mix on medium speed for a minute. Drain off the liquid and discard. 7. Rinse and discard the water three to five more times until the water runs clear.
Details
Prep time: Cook time: Total time: Yield: 2 cups butter and 2 cups buttermilk
Like this post? Pin it!